Table of Contents
Python is an interpreted, high-level, general-purpose… No! Python is love ❤ Python is bae ❤. But managing a project and it’s dependencies can a challenging task if you don’t use the right tools and methods to manage those nifty libraries.
What exactly is a virtual environment?
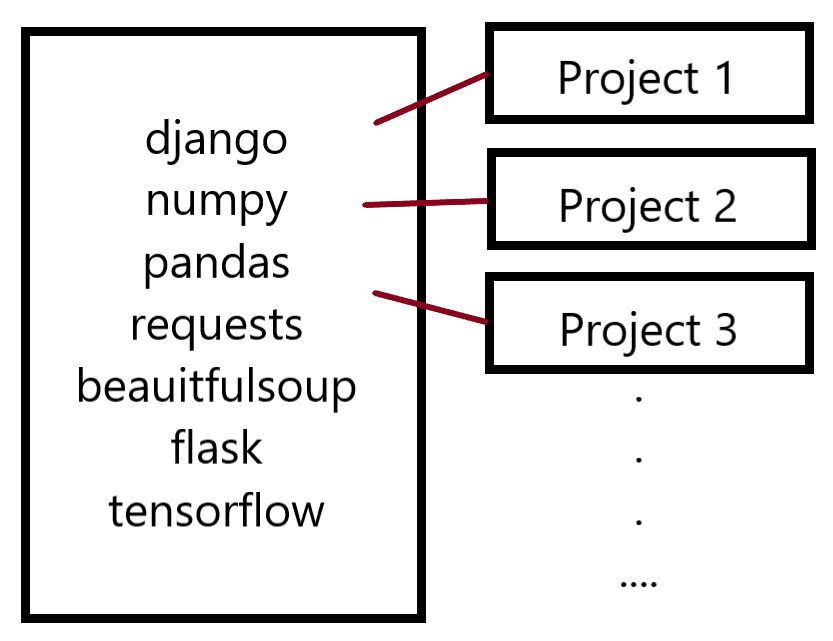
When you’re working with multiple projects in Python, there comes a time when the project is compatible only up to or with a certain version of Python, or any library that the project was using has not been upgraded to support a particular version of Python. Now, the general mistake beginners do is that they start installing libraries globally, the -U flag in pip install -U library. What -U does, is that it installs the libraries and its dependencies in the User’s home folder. Now imagine a scenario where you’re working on two or three of your personal projects, you install numpy in Project1, requests in Project2, Django in Project3, and so on. And now you’ve to share your code with your friend and now comes the problem, you’ll have to share the list of libraries to your friend and he’ll do pip install -U library1 library2 and so on.. The solution?
Meet VirtualEnv
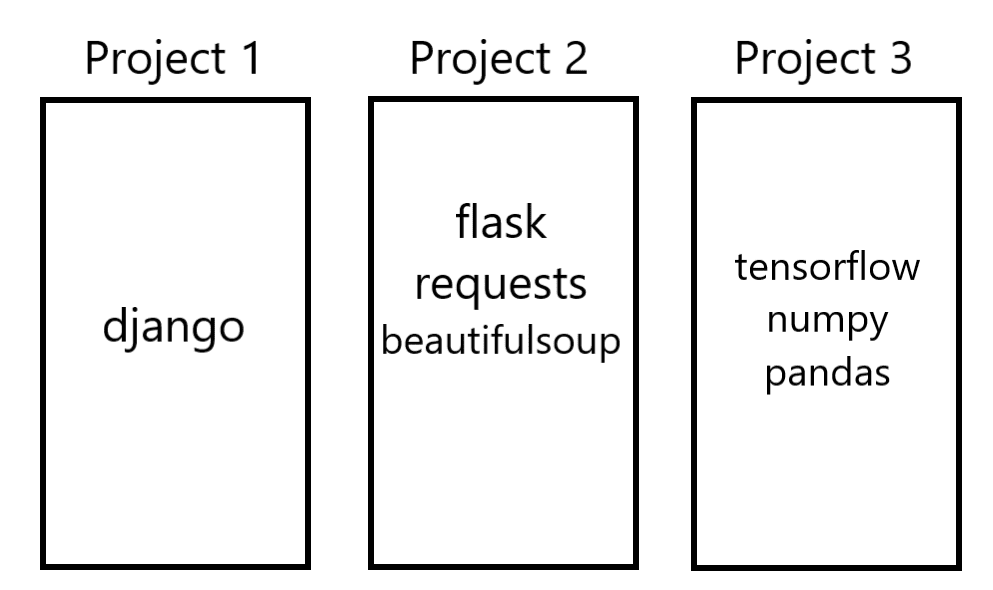
Virtualenv makes it easier to manage isolated python virtual environments. Similar to creating and running multiple virtual machines on your computer where all the files, config, software, etc are isolated from each other, virtual env creates python virtual environments where each environment can run different versions of python and have a different set of libraries installed all with their version numbers!
Once done, you can work on individual environments independently at the same time and you can export all your requirements i.e. libraries, dependencies of your project with just a command, and your friend can then install those libraries with just a command! Impressive huh?
Let’s get started
To create virtual environments, let’s install virtualenv first. Open your shell (Terminal, Command Prompt, Powershell, etc) and run the command below to install virtualenv:
$ pip install virtualenvOnce virtualenv is installed, follow the further steps to create a virtual environment:
Creating a virtual environment
To create a virtual environment run the following command in your favourite shell:
$ virtualenv -p /usr/bin/python3 venvLet’s understand what’s written above:
virtualenv: This command is used to create a virtual enviroment-pflag: This flag is used to specify which python version to use. You can skip this flag, in which case it’ll default to system’s default python version./usr/bin/python3: The value for-pflag specifying which python binary to use. You can skip this if you’ve skipped the-pflagvenv: This is the name of your Python Environment, most people useenv,venv, etc, but it’s completely up to you whatever name you would love to give to your environment
Once you execute the command, you’ll notice a new directory with the name of virtual environment you specified above, in this case venv. This folder contains all your virtual environment files including symlinks to python binaries, libraries you install in this enviroment, etc.
Activating a virtual environment
Once the environment is created, you’ll have to activate it every time you want to use it, once activated it’ll stay activated unless you deactivate it or close the terminal session. To activate the environment, run the following command:
Windows:$ venv/Scripts/activate
Linux: $ source venv/bin/activate (Fish shell users can run $ source venv/bin/activate.fish instead)
Once the environment is activated you’ll see your virtual environment name in round brackets on your shell:(venv) $ (Something like this)
Working in Virtual Environment
Working in virtual environment isn’t rocket science, once activated you can install and do all the stuff you used to do previously without worrying and of course with the -U flag. To install a library simply run (venv) $ pip install library_name and it’ll be installed in your virtual environment.
Anytime you want to deactivate the virtual environment, just run (venv) $ deactivate and the environment will be deactivated. To reactivate, just follow the procedure above.
To see what all is installed in your environment, run the following command when your environment is activated (venv) $ pip freeze
Requirements.txt file
Generally, a requirements.txt file is maintained by developers to share the requirements and dependencies of the project with various people. You can easily generate a requirements.txt file by using the pip freeze command and redirect it’s output to a requirements.txt file using redirection operator.
TLDR; (venv) $ pip freeze > requirements.txt
That’s all! Now all your libraries and projects are well managed and collaboration-friendly.
Pro Tip: Add your virtual environment directory to your .gitignore file to prevent your environment being pushed in source control. It is not a good practice to do so. You should rather freeze your requirements using the requirements.txt file and push that instead.
If you’ve any queries, you can reach me in the comment box below. Any feedback is appreciated!